Virtual audio cables (VACs) allow you to broadcast audio from your apps directly to your online radio stream. By using virtual cables, you avoid having to purchase expensive hardware. Let’s take a look at the various solutions and how to use them for radio broadcasting.
A virtual audio cable essentially allows you to take the audio from a specific app to another without having to use any physical cables. Put simply, with a physical cable, the information travels from an in point through to an endpoint. A virtual cable mimics this function, with one slight difference. VACs are able to loop your audio that arrives to the endpoint, back to the in point. This allows various applications to use the VAC as their audio input!
How to use VACs for online radio
VACs can be incredibly useful for radio hosts, as they allow you to send audio from various applications to other ones. This means that they can then be mixed together and broadcast to an online stream.
As a radio host, you may want to use audio sources from different applications and/or devices to use in your shows. This could be songs from Apple Music, or even listener calls from Skype for example. A virtual audio cable allows you to use this audio and send it to your online radio stream!
You can even take it a step further and use a virtual mixer to combine the various audio sources from one central place. This replicates the function of a physical mixing desk.
Furthermore, you can then connect a microphone to your computer and route the audio to your virtual mixer in order to mix it with the audio coming from your apps.
Setting up your virtual audio cables
Now let’s take a look at how to set up your virtual audio cable. Firstly, you’ll need to download your VAC:
Once you’ve downloaded your virtual audio cable, the first step is creating a multi-output device. This simply ensures that your audio can be heard through headphones or speakers. Bear in mind that your VAC needs 2 different outputs:
Output 1: sent to your radio stream
Output 2: sent to listen via headphones/speakers
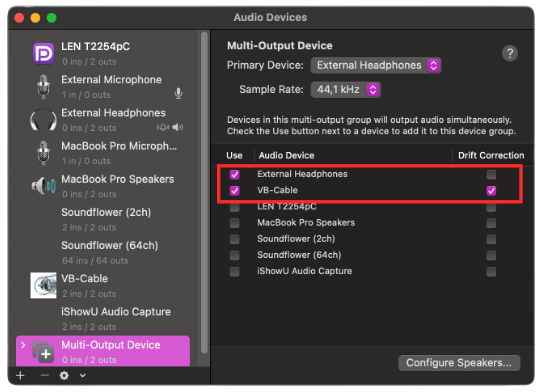
To start, head over to Applications > Audio MIDI Set Up. Then, click on the + icon at the bottom and select “Create multi-output device”.
Once that’s done, in the righthand window, you’ll need to check the boxes for VB-Cable and external headphones or your computer’s speakers. Don’t forget to verify that the master fader on each device is set to maximum.
Note: Want to send your audio to another output? Simply check the box that corresponds to it.
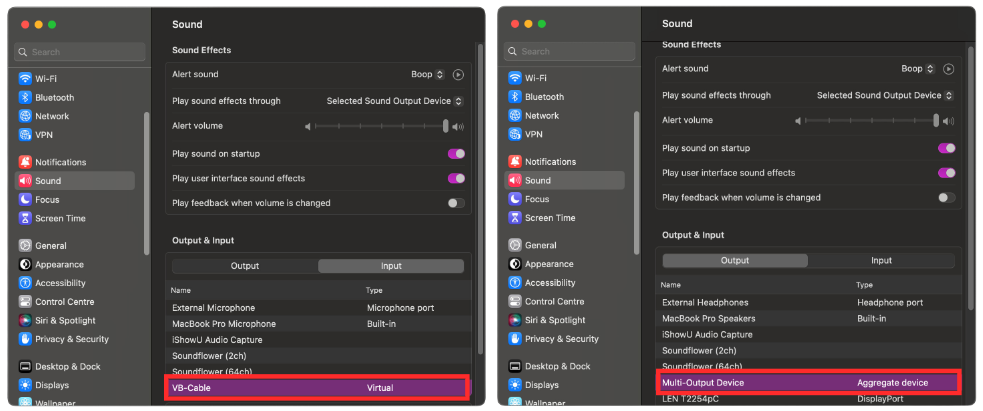
It’s now time to change the sound settings on your Mac. For this, head over to System Settings > Sound. Simply change the input by selecting your virtual audio cable (named VB-Cable) and then switch your output to “Multi-output device”.
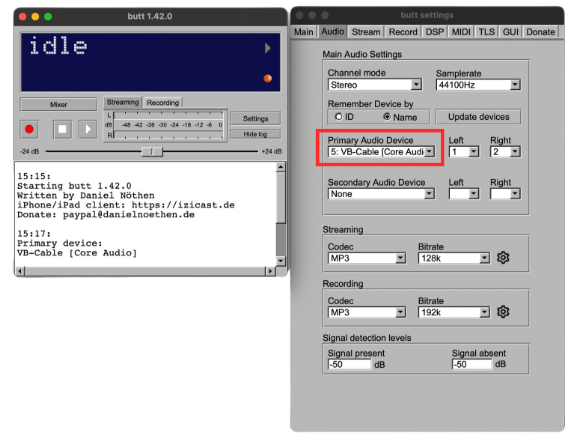
Lastly, open up your preferred broadcasting software and change the input to your VAC. Here’s an example of what that looks like using BUTT:
Setup for Windows
Once you’ve downloaded your VAC, head over to your Windows sound settings. Go to System > Sound. Choose your VAC as your input source (Cable Input, VB-Audio Virtual Cable) and click on OK.
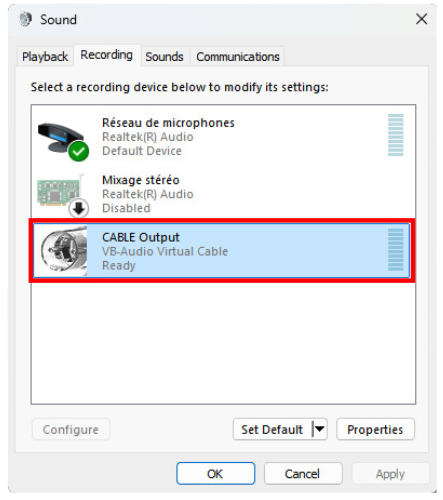
Next, head over “other audio setting”, go to the Recording Tab and choose your VAC again.
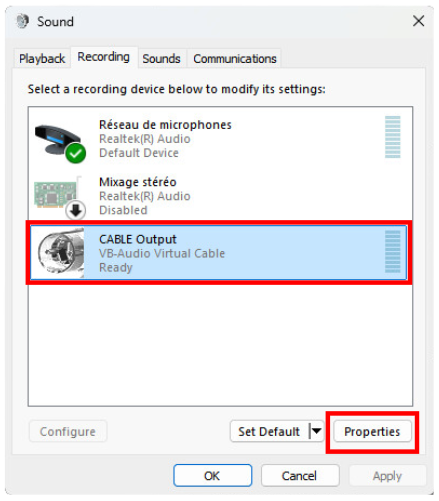
By clicking on OK your preferences will be saved. However, as the audio is in a closed loop you won’t actually be able to hear it. To fix this, go back to the Recording Tab > Select your VAC >Properties.
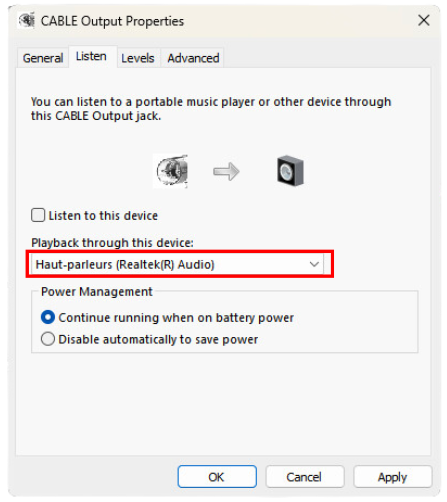
Under the Listen Tab check “Listen to this device”. You’ll see a dropdown menu> select your speaker or headphonesin the list.
Don’t forget to click on OK.
To finish, open your preferred broadcasting software, such as BUTT. Go to the Audio Tab > Audio Device and select your VAC.
What about virtual mixers?
As we’ve seen, VACs allow us to broadcast our computer’s audio. However, as soon as we want to add in microphones or other audio sources it can become a bit more complicated.
Using a virtual audio mixer will give you control over each audio source, providing you with a place to manage your audio routing. It does the same job as a physical mixing desk, but remains a cheaper option. Let’s take a look at 2 solutions: one for Mac and one for Windows.
Audio Hijack (MacOS)
This virtual mixer for Mac users is available from $69.
It works using blocks that can be dragged and dropped to create a setup that best suits your needs, whilst remaining user-friendly. Each block has a dedicated function, for example:
capturing sound
adding multiple audio sources
recording
adjusting audio (EQ-band, etc…)
You can add as many audio sources/inputs as you want!
VoiceMeeter is a virtual mixer for Windows users. There are currently 3 version:
VoiceMeeter
VoiceMeeter Banana
VoiceMeeter Potato
Each version provides more audio inputs/outputs than the one before. This allows you to choose a more simplified or complicated version, depending on your technical knowledge and your needs.
Bear in mind that the software is available via Donationware. You’ll see that there’s a guide that indicated how much to donate according to the version you use.
This software is slightly different from Audio Hijack as you can’t connect Apps to the mixers inputs. This is where our VACs come in handy! You can set your audio preferences in a desired app, such as Skype for example, to your VAC. Then, simply route this cable to an input in VoiceMeeter!